How to make a clipping mask in Photoshop
4 easy ways to make a clipping mask in Photoshop
Here in the southwestern desert at Desert Life Design, we use graphic design, photography, and creative writing to create a compelling call-to-action.
4 steps to make a clipping mask in Photoshop
by Doug Martin
Desert Life Design™
The clipping mask is one of my favorite Photoshop options, as well as one of my favorites when I use InDesign. In Photoshop, a clipping mask is when one layer is masked inside another layer.
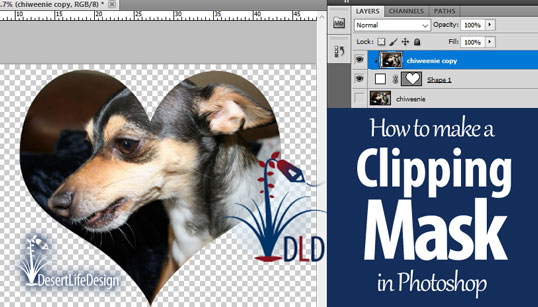
To make a clipping mask, you need two abutting layers, one on top of the other (see Layers tab in the image above).
You need two layers for a clipping mask
To make a clipping mask in Photoshop, you will need two layers. The layers must be in contact, with one layer on top of the other.
The clipping mask will always be applied to the top layer, while the bottom layer becomes the mask.
After reading the instructions, please see my examples
Read the simple ways to make a clipping mask below, then look at my examples. I purposely made my examples gaudy and possibly in poor taste. They are for illustration purposes only, and not examples of great design techniques.
When you look at my clipping mask examples (see below), you'll see I used big, bold type to mask an image. In that case, I placed the type on the bottom layer, and placed the image on the layer directly above.
Another example shows a heart shape clipping an image of my pet. Just like before, I placed the shape on the bottom layer and the image above.
How to make a clipping mask in Photoshop
There are at least four ways to make a clipping mask in Photoshop. They include:
1.
Select the layer you would like to mask. Right-click and select Create Clipping Mask from the drop-down menu.
This is the method I use most often -- I find it quick, easy, and convenient.
Or, you can...
2.
Select the layer you would like to mask. In the menu bar, click Layer. Select Create Clipping Mask from the drop-down menu.
Or, you might also...
3.
Place your mouse pointer on top of the line connecting your two layers and press Alt (or the Option key in your Mac). The pointer will change into the clipping mask icon with two overlapping circles. Then, click your mouse.
Or, you could try the shortcut key combination...
4.
Select the layer you would like to mask. Use the shortcut key combination of Alt+Ctrl+G
Clipping masks offer many creative possibilities
Clipping masks are easy to make, and they open the door to a world of creative possibilities. You can use multiple clipping masks to create beautiful combinations.
The overriding factor for all clipping masks, though, is that you need two abutting layers. The top layer will be clipped or masked behind the bottom layer.
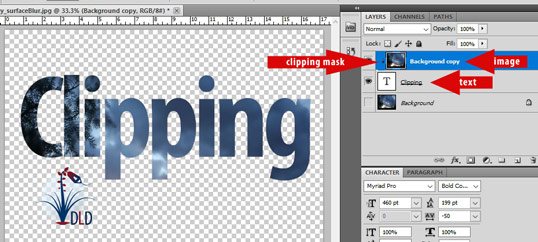
Clipping masks require two layers. The lower layer will have text or shapes which will hold the image. The upper layer will hold the image you'd like to fit into the lower layer.
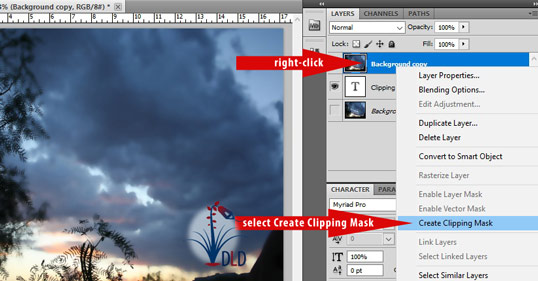
One way to make a clipping mask is to select the upper layer. Right-click, then select Create Clipping Mask from the drop-down menu.
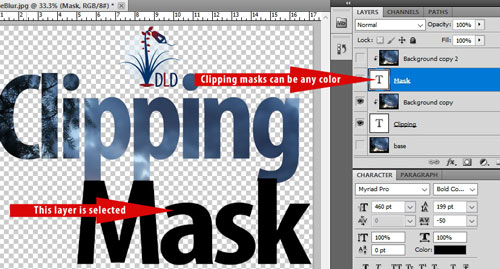
A mask, such as the type in my example, can be any color.
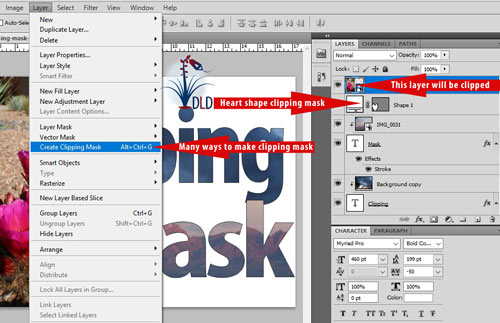
Another way to make a clipping mask is to select Layer from the Menu bar, scroll down and select Create Clipping Mask
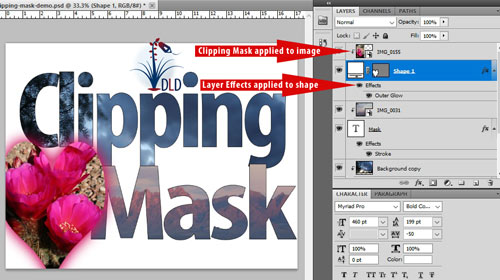
You can make a clipping mask with any shape. In the example above, I used a heart. Above the shape layer, I added a layer with an image.
Afterwards, I used Layer Effects to add an Outer Glow to the shape.

Desert Life Design™ is based in the Phoenix, Arizona metro area. Here, we strive for perfection in graphic design and concise written communications.
